Introduction
In this blog post, we’ll guide you through setting up SSH key-based authentication between two Linux virtual machines (VMs). This secure and efficient method allows you to connect to your VMs without the need for passwords, enhancing both security and convenience.
We’ll be using two VMs in this example:
- Kali Linux (VM1): 192.168.189.128
- Ubuntu (VM2): 192.168.189.131
Things we need
- Two Linux VMs (referred to as VM1 and VM2).
- Basic understanding of Linux commands and SSH.
- Both VMs should be network accessible from each other. They can be on the same local network, a virtual network, or configured for remote access.
Step 1: Install OpenSSH Server
First, ensure that the OpenSSH server is installed on both VMs. This allows each VM to accept SSH connections.
On both VM1 and VM2, run the following command:
sudo apt update
sudo apt install openssh-server
Verify that the SSH service is running:
sudo systemctl status ssh
If the SSH service is not running, start it with:
sudo systemctl start ssh
Step 2: Update the /etc/hosts File
To make it easier to refer to your VMs by name instead of IP address, update the /etc/hosts file on VM1 to include the IP address and alias for VM2.
On VM1 (Kali Linux), open the /etc/hosts file:
sudo vi /etc/hosts

Step 3: Generate SSH Key Pair on VM1
On VM1, generate an SSH key pair using the ssh-keygen command:

You’ll be prompted to enter a file in which to save the key. Press Enter to accept the default location (~/.ssh/id_rsa). Optionally, you can set a passphrase for added security.
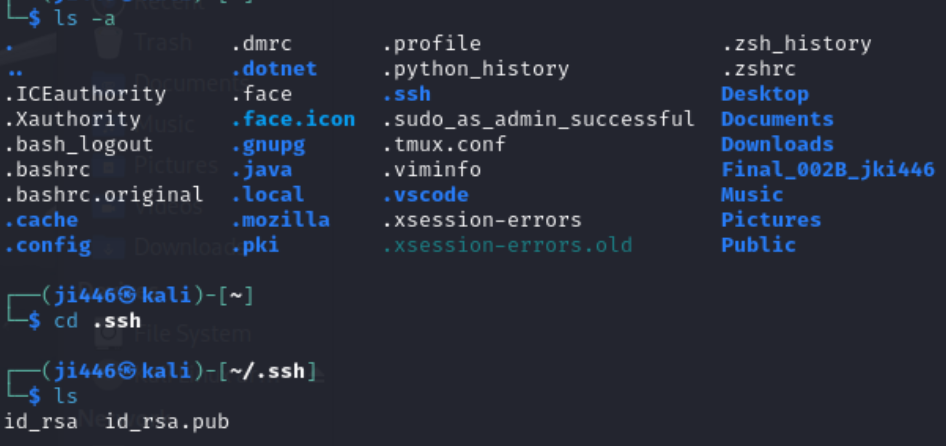
Now, you can check ssh key created and saved into defalut location.
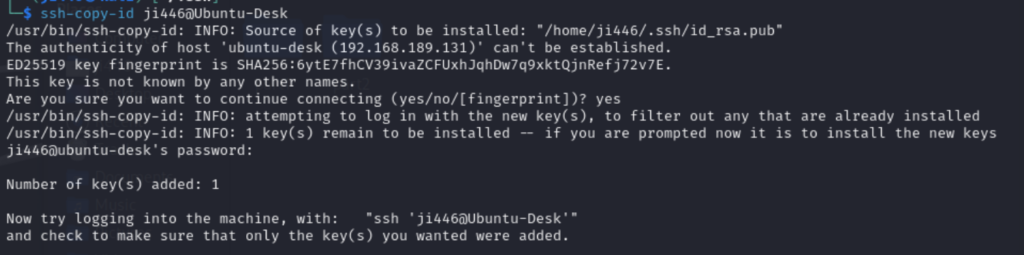
Step 4: Copy the Public Key to VM2
Next, copy the public key from VM1 to VM2. You can do this using the ssh-copy-id command, which simplifies the process:
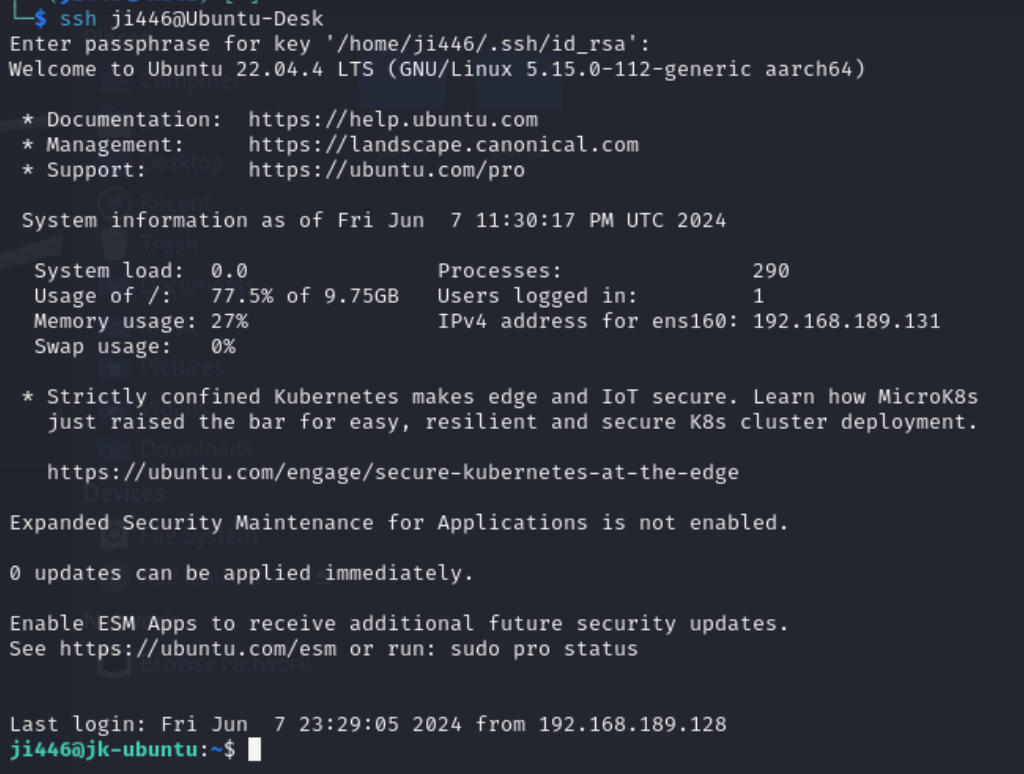
Step 5: Test SSH Key-Based Authentication
From VM1, attempt to SSH into VM2 using the alias defined in the /etc/hosts file:
Quick Demo/Test
To ensure that your SSH setup is functioning correctly, you can perform a quick demo/test:
Once logged in to VM2, create a text file using the following command:

Check if the text file exists on VM2 from VM1

You should see the file listed, confirming that your SSH setup allows for remote file creation and verification.
Conclusion
This method not only enhances security but also simplifies the process of logging into your VMs. For additional security, consider using passphrases for your SSH keys and regularly rotating your keys.